Chapter 10 Participants
The “Participants” view is one way to access participant information. It is very similar to the “Participant search” view, and it is mostly down to personal preference on which to use. You can customize “Participant search” to show exactly the data you want to see, while “Participants” is predefined and more simplistic. One important difference remains, however: the “Groups” tab, which only exists under “Participants”.
Depending on which project is selected in the dropdown in the main menu, the result in the “Participants” view will differ. If a specific project is selected, only participants in that project wil be shown under each tab.
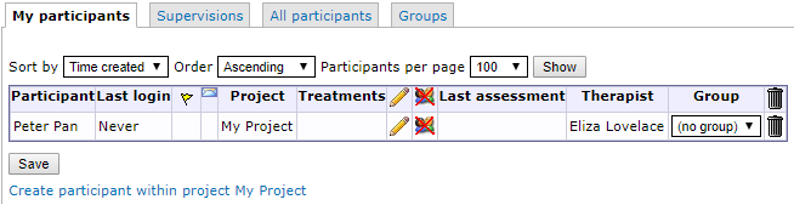
In “Participants”, there are four tabs:
- My participants, which shows you any participants assigned to you (as a therapist)
- Supervisions, which is similiar to “Supervised participants”
- All participants, which shows you all participants in a project. If no project is selected, it will show all participants in the database.
- Groups, which shows you the groups created in a project, and gives you the tools to manage them.
10.1 Creating, deleting and editing participants
You can create new participants in two of the tabs in the Participants view; My participants and All participants. Participants that are created in the My participants tab will be tagged as your participants automatically, while participants created in the All participants tab won’t be tagged. To create a new participant, click Create participant within project [Project Name]. Newly created participants are added at the bottom of each view.
To delete at participant, click the trash bin icon to the far right of the corresponding participant’s row.
To edit a participant, click the pencil icon in the table, on the corresponding participant’s row. This will take you to the “Participant stats” view.
If you only wish to change, or add, what group a participant belongs to, you can do so directly in the Group column of the participant table by using the dropdown. When you’ve assigned a participant to a group this way, don’t forget to click the “Save” button at the bottom of the table.
10.2 The participant view
When you create or edit a participant, the participant view is shown. If you made any changes to the participant, don’t forget to save them by clicking the “Save” button at the bottom of the page. To exit this view, and return to the participants table, click the “close” text to the right of the participant’s name.

There are seven tabs in this view:
- Participants stats, where you can view all fundamental information on the participant
- Treatments, where you can view and manage any treatments connected to the participant
- Files, where you can upload files relevant to the participant. These files cannot be viewed by the participant, but only by therapist who have access to the participant.
- External messages, where you can manually send SMS or e-mail messages to the participant, and review the status on any previously sent, manual or automatic, external messages.
- Flags, where you can view and manage any flags the participant might have.
- Assessments, where you can view and manage assessments for the participant. You can also activate or deactivate individually managed assessment through this view.
- Graphs, where you can see graphs on the answers the participant has given on recurring assessments. The graphs do not show individual items but only sums and sub-scales defined in the instrument scoring.
10.2.1 Participant stats
This view shows information about the participant, such as ID-numbers, name, the therapist assigned to the participant (if any), any notes on the participant and more.

The Show participant log button on the top of this view will show a log of all changes and updates done to the participant.
The Show notes button will show a log of all notes written aout the participant.
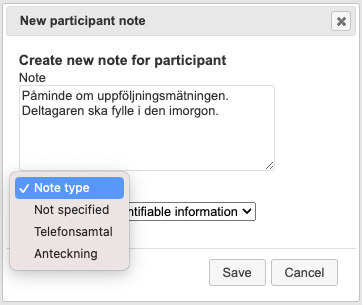
Notes on a participant can be added by clicking the Create new note link.
Important note: Prior to doing this for the first time, make sure to add at least one note category through the Note categories, accesssed from the main menu. Example of note category definition is
01:Telefonsamtal
02:Anteckning
Stats
The Stats box shows data such as how many times the participant has logged in and which privacy consent was approved and when. Internal ID is the identification number of the participant used by the database.
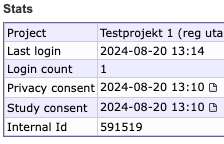
Click the document symbol next to the consent date to see exactly what text the participant consented to.
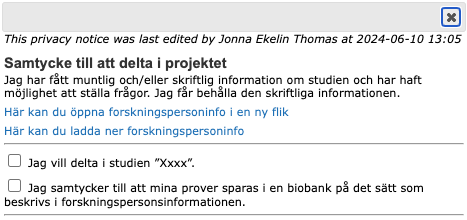
Important note: It might look like the participant has not given their consent as the checkboxes are not marked. The reason for this is that this view only renders what was defined in the study consent field (in Registration options) at the time of the consent. The study consent step can however only be completed by checking all checkboxes presented, and only then is a date for the consent saved on the participant. See more information on how to set up the consent in Chapter 8.
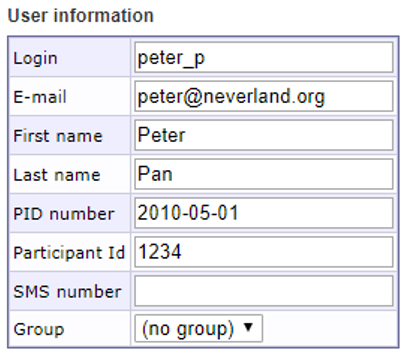
User information
User information can be edited in the User information box.
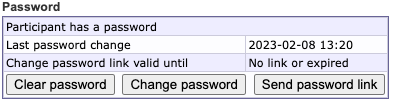
Password
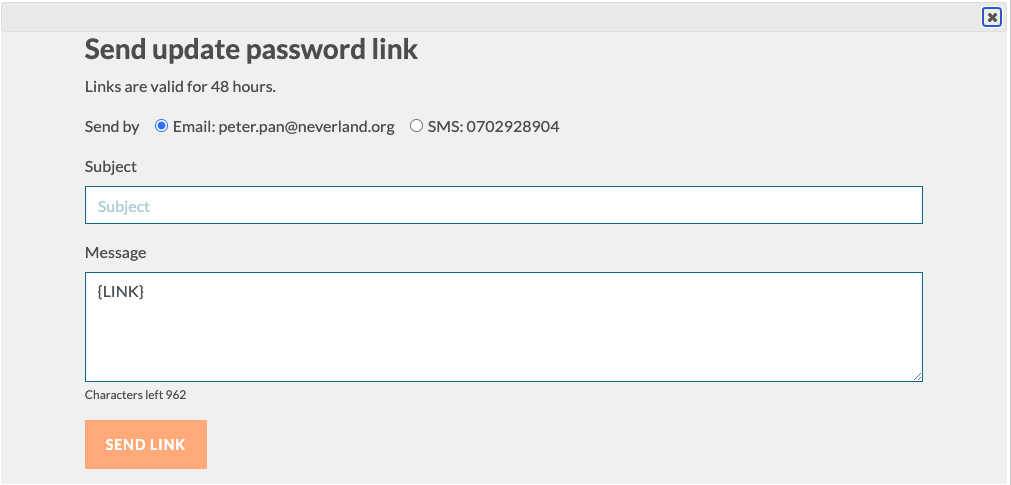
Existing passwords cannot be retrieved, only cleared or changed. If a participant reports a lost or forgotten password, you can provide them with a link to reset and change their password by clicking the Send password link button. You can send it by email or SMS, and add a personalized message as long as you don’t remove the {LINK} from the Message box.
If using quick login, it is also possible to generate new quick login codes, and to send them by SMS, from this view, see below.
Two-factor authentication method
The avalable choices are determined by the settings in the main menu Project Security, see Chapter 6.1.
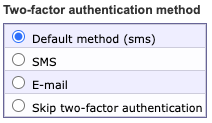
Important note: Exempt from two-factor authentication must be enabled under Project security in the main menu. Only participants can be exempt from two-factor authentication. It is mandatory for therapists.
Quick login
Here you can see if a participant has an active Quick login code and when it will expire. They should be renewed automatically when assessments are activated. See Chapter 12.1.11 for information on how to ensure this. However, it is also possible to generate a new quick login code manually if needed. Do so by clicking Generate new code which generates code but do not send any notification to the participant, or by clicking New code by SMS which generates a new code and sends it to the participant in one go.
Hint: For easy use of the New code by SMS functionality, make sure to first define a standard message for this in the main menu External Messages > field Standard SMS with quick login code. Also make sure that this standard message includes the tag {QUICKURL}. See Chapter 7.
Important note: Quick login settings are enabled and managed under Security settings in the main menu. See Chapter 6.2.2 for more information on what it is and how to use it securely.
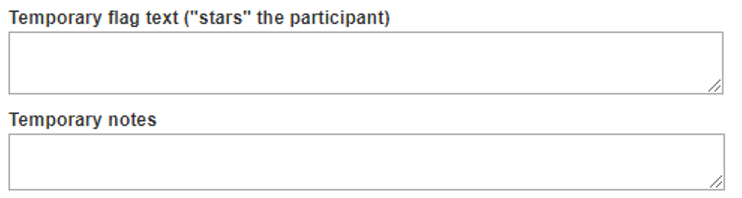
Temporary fields
The Temporary flag text box provides you with the possibility to flag a participant with a star icon, that will display next to their name in the participants table. You can add a comment on why you flagged the participant.
The Temporary notes box provides you with the possibility to add a temporary note on the participant - this note is also saved in the participant log if your click the “Save” button.
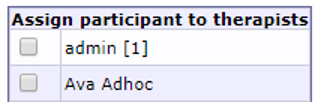
Assign participant to therapists
This table allows you to assign the participant to another, or several other, therapist(s). The number shown in brackets to the right of each therapist’s name displays how many participants are already assigned to that therapist. This is useful for when you want to assign participants equally to the available therapists.
Remember to click “Save” to save your changes.
Move participant to another project
You can use the dropdown menu on the bottom of the page to move the participant to another project. This will move the participant to the project of your choosing, and close the tab. If you want top view the participant again, you will need to navigate to the destination project before being able to do so.

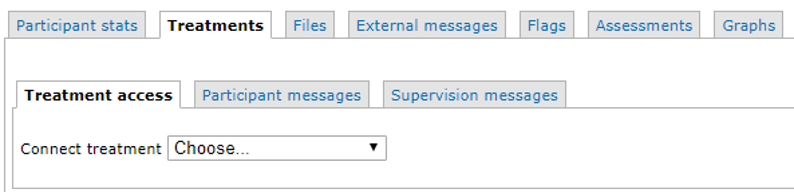
10.2.2 Participant treatments
To assign a participant to an existing treatment, go to Participants, Treatments, the Treatment access tab. All available treatments are listed here in the dropdown menu.
If a treatment doesn’t show up in the dropdown menu, you will have to make it available via Treatment containers in the main menu.
Important note: While it technically is possible to assign several treatments to the same participant via the admin interface, the participate will only be able to access one of the treatments at a time.
When the treatment is connected you can adjust the default treatment settings for a particular participant, and for example disable and enable modules.
 This view also lets you see how the participant has interacted with the treatment modules. You can view any data that the participant has provided in the treatment modules by clicking Show in the different tables.
For homework content you can mark them as reviewed (green checkmark), or return the homework to the participant (red circle with diagonal line).
If you are using community content reactions in your treatment, you need to approve reactions (green checkmark) in this view before they get visible to other members of the participant’s group. The participant will not be informed whether the reaction har been approved or not.
Note: Reviewing or returning homeworks do not notify the participant. Any comunication around homeworks or other treatment content need to be manually handled with chat messages in Participant > Treatments > Participant messages.
Note: Reactions that need to be approved will show up as homework in the Participant Search list. For more information on Content reactions see Chapter 13.5.1
Participant treatment messages
To write messages in the participant treatment chat go to Participants, Treatments, the Participant messages tab. Here you can send messages and also read answers from the participant. These chat messages will appear in the messages menu for the participant when logged into the treatment.
Note: Setup for how the participant is notified of these chat messages can be done in the main menu External messages, see Chapter 7.
Note: When a participant has sent a message in the chat, this can be seen in the participant list views and is indicated by a letter icon.
In some studies, you may want to record how much time is spent writing messages to participants by a therapist. This functionality needs to be activated for each project. Go to Projects in the main menu, and check the Timing column to do so.
When this functionality is enabled you will be presented with e slightly different view when writing chat messages in the participant treatment.
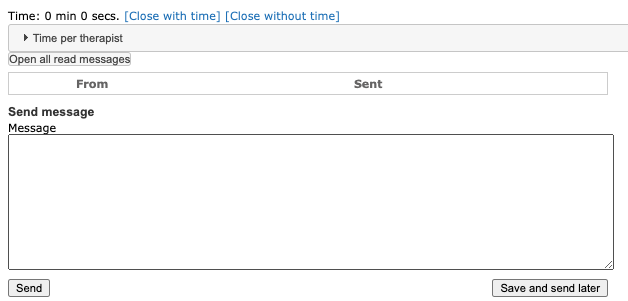
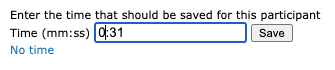
When you have written and sent your message you can choose to close with time (i.e. have the time you spent on the participant recorded) or close without time (not save any additional time for this interaction). If you close with time, you will also be able to adjust the time you spent.
Hint: For information on viewing data regarding time per therapist, See Chapter 16.2.2.
Supervision messages
The tab Supervision messages can be used by a therapist and the therapist’s supervisor to discuss the treatment for the patient. They can add notes and send messages to each other. These are only visible in the admin interface and not to the participant. This view also displays the chat messages with the participant for easy access.
Hint: For information on notifications for supervisors, See Chapter 9.4.
10.2.3 Participant External messages
To send external messages to a participant go to Participants, External messages, the New message tab. Depending on which data is available you can send text messages (SMS) or emails. Be aware that there is a limit of 160 characters for the text messages, but not for email messages.
Note: This restriction of available characters applies also to the text messages sent out through the assessment notifications, so use your words wisely, or your outgoing messagees to participants might be truncated
To view previously sent messages, or to troubleshoot why messages haven’t been received by a participant, go to the tab Sent messages. Here you can see messages sent manually from the previous tab, or through automatic notifications from assessments. You will also see any update password links or quick login codes that have been sent out from the **Participant stats view. You can see the status of the message, if it’s in the outgoing queue or already sent, or if there is an error.
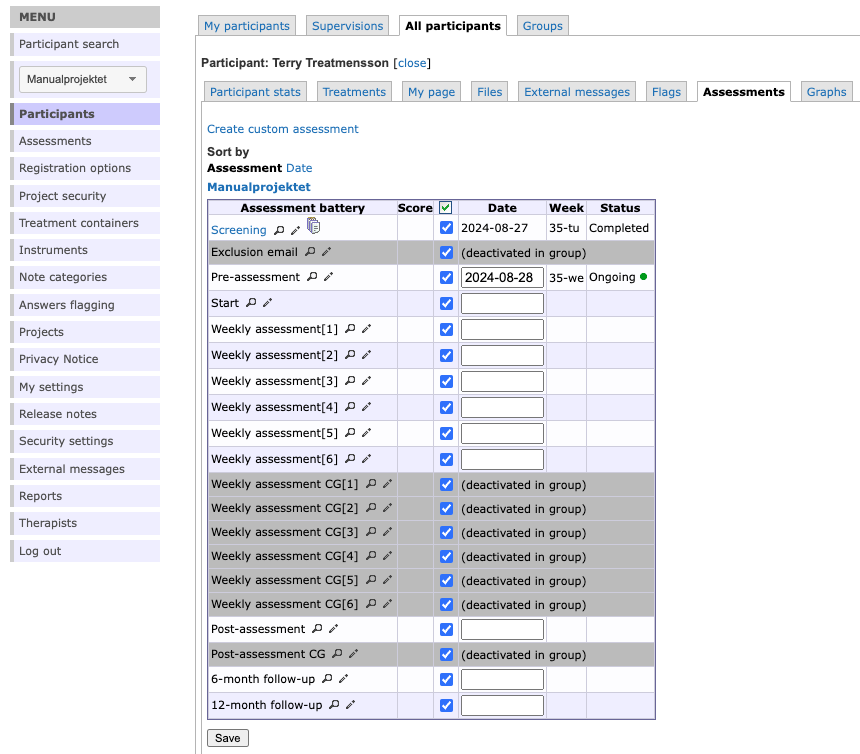
10.2.4 Participant Assessments
This view lets you administer assessments for a particular participant and also view the completed assessments. Whether you have restricted the available assessments by groups or not, all or some of the assessments in the project might be available for the participant.
Hint: See Chapter 14.1.for more info on assessment restrictions by groups
 You can hover your mouse over the magnifying glass to get a quick view of which instruments are included in each assessment.
For completed assessments you can viw the answers in a number of ways. You can click the icon of stacked documents to see all the filled in instruments in one view. You can click the name (the blue link) to expand the assessment and see all sums and scoring available for the included instruments. You can click the document icon on each instrument to see all the answers for that particular instrument.

Hint: If you for some reason want to discard a completed assessment you can do so by clicking the pen icon. You will have to give a reason, and the discarded assessment will show up in a separate list at the bottom of the participants assessment view. After that, the original assessment can be assigned agin if new answers should be collected.
For assessments that have not yet been started or completed you can click the pen icon to add extra instruments that you want this particular participant to answer as part of the assessment. You can choose from all available instruments in your database.
For assessments that are available but have not yet been assigned you can enter a start date in the date column and save at the bottom of the page. The participant will be notified of the assessment according to the assessments notification settings on the day the assessment becomes active, ie. status ongoing.
Hint: For more info on date and time settings for notifications see Assessment reminder settings in Chapter 7.
If a dependency has been set up for your assessments, adding a start date for one assessment and saving, might trigger automatic scheduling for other assignments. (Se example below for assessment Start) These dates can all be adjusted after they have been automatically filled if needed.
Hint: To go back to the default scheduling after having adjusted dates, clear the date that the other assessments depend on and save. Enter a date on the assessment again, save, and the dependent assessments will be defaulted again.

You can also create a custom assessment for the participant if needed. Click Create custom assessment at the top of the view.
Important note: The custom assessments are not automatically notifified to the participant. It’s recommended to send out a message from the participant’s External messages tab inluding a login or quick login link for this.
Last but not least, if you have clinician assessments, you can fill these in at any time by clicking the name (blue link), and then the icon with a document and a pen next to the instrument. Fill in the form and submit. The completed date is saved.

If you need to update the clinician assessment you can click the icon with a document and a pen again, and you will have to give a reason for the update, and can update the previously saved answers (you do not have to fill it in again from scratch).